
EP1000
Digital Fab & Prototyping Fundamentals
Fusion 360
Drawing
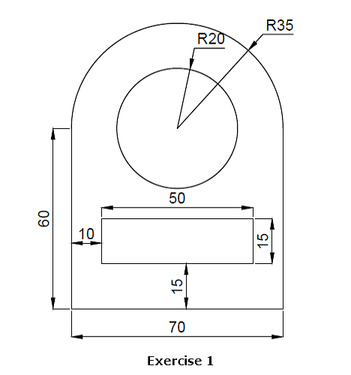
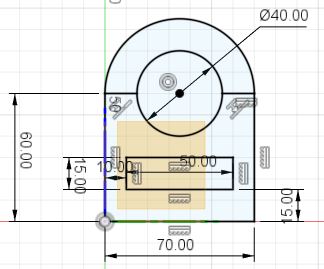
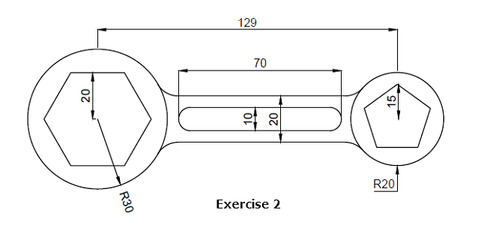
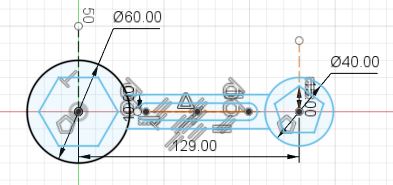
Getting used to drawing a sketch is essential to becoming proficient in Fusion 360. So I started by copying specific shapes and making them a sketch in Fusion 360.
3D Model
After getting some practice with drawing, I decided to take a leap and 3D model some novelty items as a first test.
Nametag
An effective way to practice sketching and extrusion of different sections. Adding text and extruding it as well.
- Selecting the bottom plane, sketch out the relevant dimensions that will encompass your nametag. (The entire nametag must not exceed 30mm x 70mm x 4mm)
- Use the text tool to type your name out and position it in the center of the nametag.
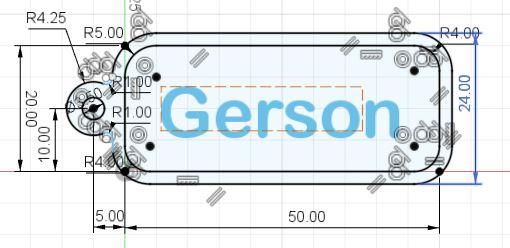
- Finish the sketch and extrude the outer border and the name to 4mm (Settings used: Extrude, One side, 4mm, New Body)
- Extrude the inter section of the nametag to have a lowered section to see the name well. Be sure to select Join instead of New body when completing this step.
Download Here: Nametag.f3d
Fidget Spinner
The design of the fidget spinner is based on the popular anime Naruto. This example teaches us more sketching techniques, using the circular patterning tool.
- Sketch a 50mm circle on the bottom plane to limit the size of the fidget spinner
- Sketch a design that will be at the circumference to the circle and constrain it vertically above the origin. (Include a hexagon as we will be using M8 hex heads as the weights of the fidget spinner)
- Use the circular pattern tool and create 2 more copies of your design that will be 120 degrees apart from each other. (Settings used: Circular pattern, select origin to revolve around, 3, 360 degrees)
- Add other lines or circles to ensure that your sketch will be a closed profile
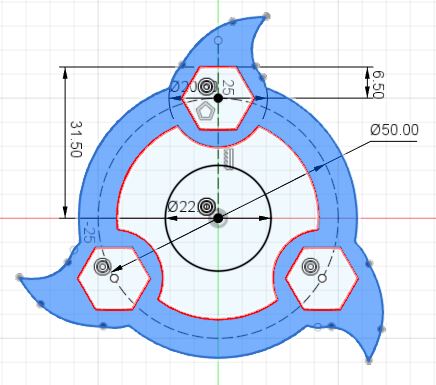
- Finish the sketch and extrude the outer section to 8mm, and the inner section to 7.5mm. The hole in the center is for the ball bearing that will spin the fidget sinner.
Download Here: fidgetspinner.f3d
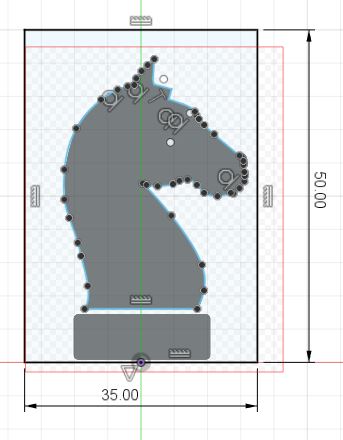
Chess piece (Knight)
Creating the chess piece is quite a good beginner project as I was able to get a hang of Fusion 360 like importing an image to draw and take reference from, the line and spline tool to draw out the head of the chess piece. I also learnt how to use the extrude and revolve tool to create my 3D model.
- Sketch a 35mm x 50mm rectangle and constrain the midpoint of the width to the origin, on the XZ plane. (Z pointing up)
- Import an image of the knight piece outline
- Trance the outline of the horse head with the line tool and spline tool.
- Extrude the closed profile of the horse head. Settings I used were Extrude, Symmetrical, 3mm, New Body
- Create a new sketch on the same plane and sketch the outline of the base.
- Offset the outline of the drawn base inwards
- Cut out any unneeded lines
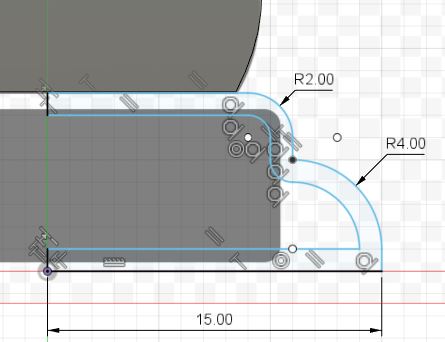
- Select the closed profile and use the revolve function selecting the Z axis as the revolve axis.
- Change the setting
New Bodyto Join. And your done.
Download Here: knight.f3d